Getting an API Key
Create an API key through the dashboard or the API. Choose individual permissions for the integration, or Grant all access for full access within the key's account and permitted account hierarchy. All access does not grant access to unrelated accounts or bypass account-type restrictions.
Choose your environment
Use the dashboard, API URL and key from the same environment.
| Environment | Dashboard | API base URL |
|---|---|---|
| Development | app.dev.koard.com | https://api.dev.koard.com |
| UAT | app.uat.koard.com | https://api.uat.koard.com |
| Production | app.koard.com | https://api.koard.com |
You need dashboard access to the account, or an existing API key that can create keys for it. If you do not have an existing key, use the dashboard workflow below.
Create a key through the API
1. Select permissions
Send a non-empty permissions array to POST /v5/apikeys. For example, this creates a key that can read payments and batches:
curl --request POST 'https://api.dev.koard.com/v5/apikeys' \
  --header 'X-Koard-apikey: YOUR_EXISTING_API_KEY' \
  --header 'Content-Type: application/json' \
  --data '{
    "name": "Read-only reporting",
    "permissions": ["payments:read", "batches:read"]
  }'
The existing key needs apikeys:create for its own account. You can grant only permissions it already holds. To issue a key for a descendant account, include that account's account_id and use a caller with apikeys:create:sub. Omit account_id to issue the key for the caller's own account.
Common permission values include:
| Permission | Access |
|---|---|
payments:read |
Read transactions |
payments:tap-ios |
Tap to Pay on iPhone operations |
payments:tap-android |
Android tap operations |
payments:refund |
Refund eligible transactions |
batches:read |
View batches and their details |
terminals:read |
Read terminal configurations |
all |
All permissions allowed for the account |
See Authentication and the API Keys reference for the full permission catalogue and account restrictions.
2. Use all access when required
For an integration that needs all available operations, use this request body with the same endpoint:
{
  "name": "Development integration",
  "permissions": ["all"]
}
The caller must be allowed to grant all. This creates a new key with all access; it does not change the permissions of an existing key. Permissions are immutable after creation, so create a replacement key when its permission set needs to change.
You can also include expires_at as an ISO 8601 / RFC 3339 date-time to set an expiry.
3. Save the returned secret
A successful creation returns HTTP 201. Copy the returned key value into your integration's secret storage. Use key, not the key's id or key_last4, in the X-Koard-apikey header.
Generated keys are returned only once. Later reads return key: null and the last four characters in key_last4. If you lose the generated secret, create a replacement and revoke the old key.
Create a key through the dashboard
Screenshots below show the dashboard's API-key panel with example account data and a nonfunctional example secret.
1. Open API Keys for the intended account
Sign in to the dashboard for your environment and select the correct organization/account. Open Developer, then API Keys. For a PSP or partner account, you can also open Accounts, select the account, and open its Developer tab. Both locations use the same API-key panel.
Check the account before creating the key. If the account is not linked or the key controls are unavailable, an account administrator needs to resolve your dashboard access.
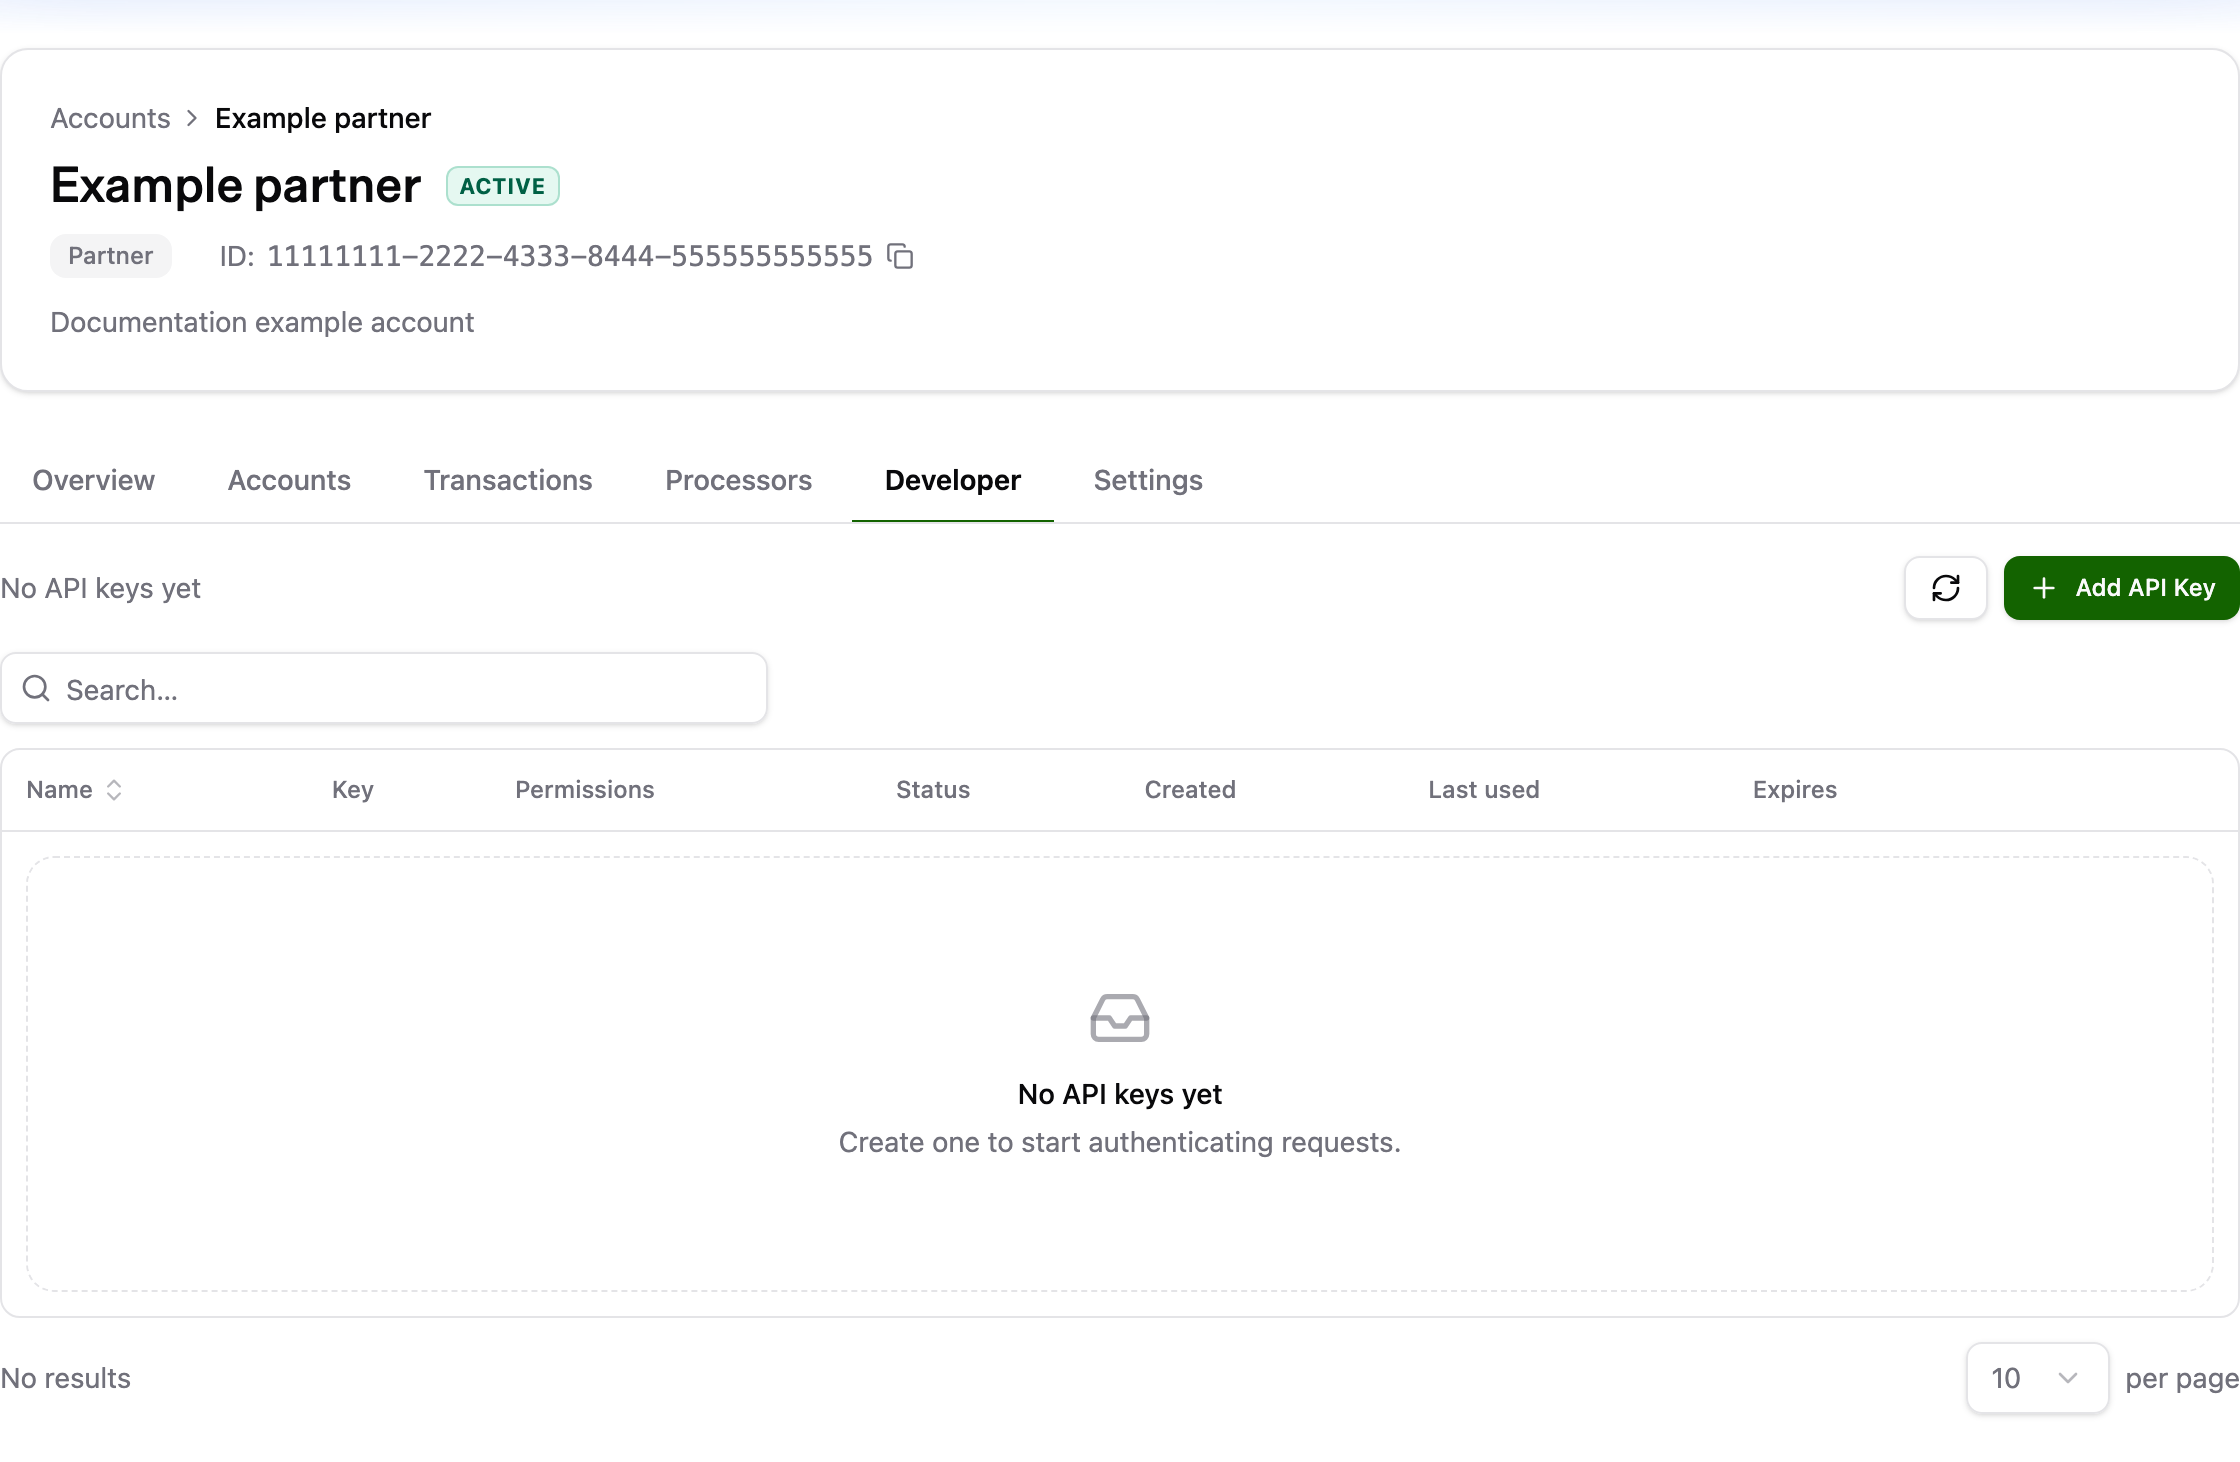
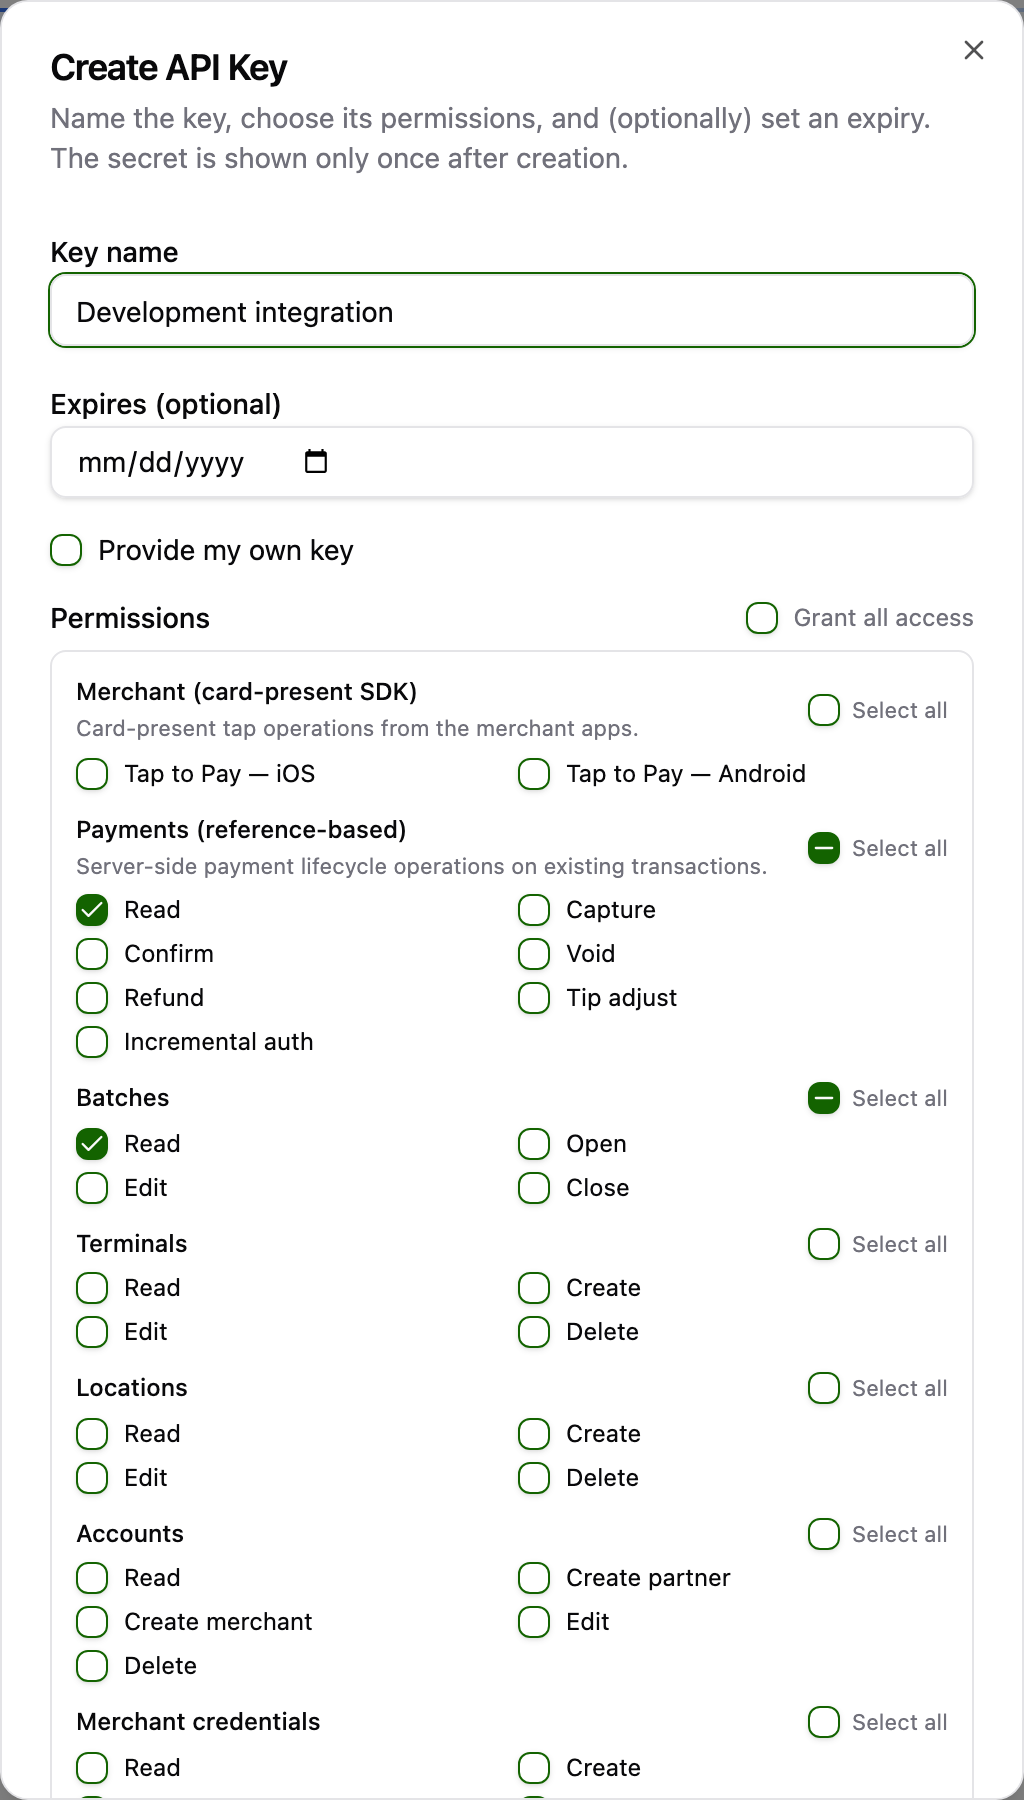
2. Choose the name and permissions
Click Add API Key and enter a Key name. Set Expires (optional) if the key should expire on a particular date. Leave Provide my own key unchecked to have Koard generate a secret.
Select the individual permissions your integration needs. The initial selection is read-only payments and batches; it is not all access.
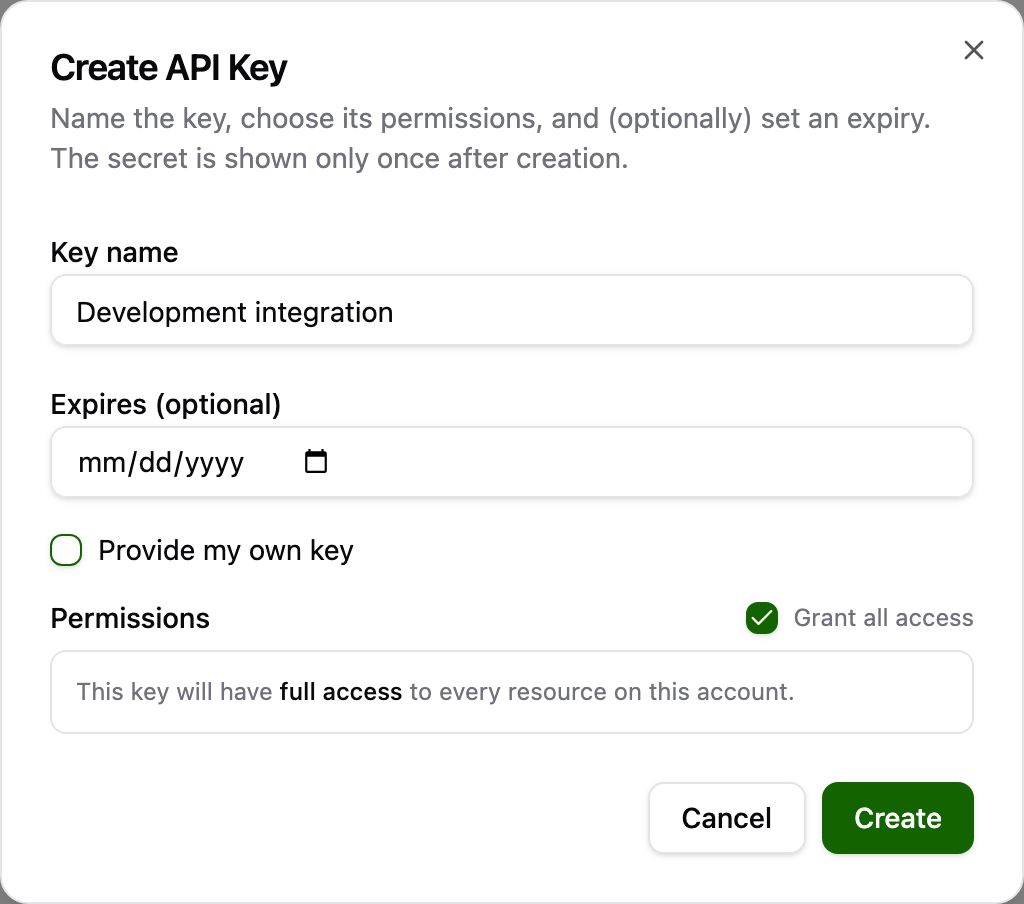
For full account access, select Grant all access. This sends permissions: ["all"], matching the API workflow above.
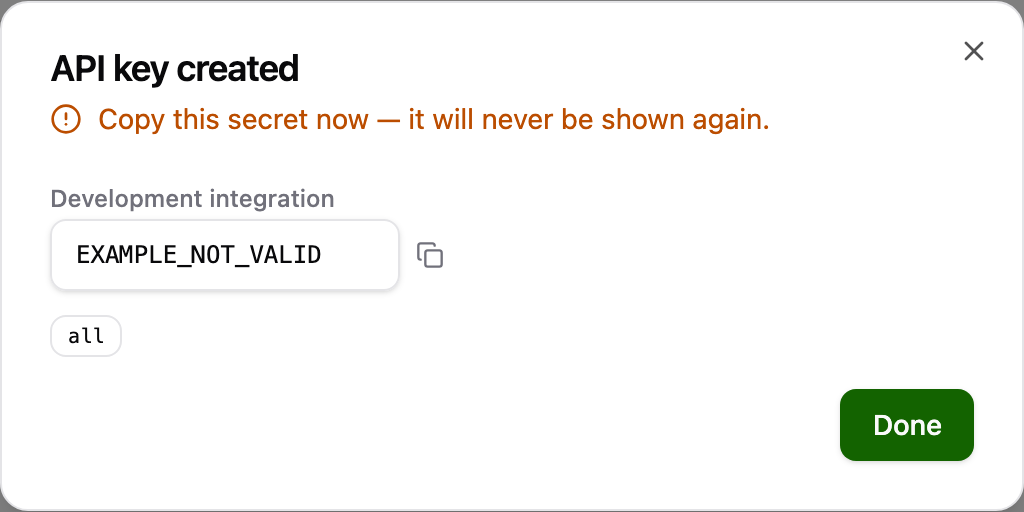
3. Create and copy the key
Click Create. In API key created, copy the secret before clicking Done. The dashboard cannot reveal a generated secret after this dialog closes.
Use and rotate the key
Send the secret in X-Koard-apikey on requests to the matching API environment. A key's account and permissions determine the data and operations it can access. Creating an API key does not create a dashboard login or change organization membership.
Keep the secret out of public repositories, screenshots and logs. Share it only through your approved credential-sharing channel. To rotate, create a replacement, update and verify the integration, then revoke the old key. The dashboard's Revoke key action permanently deletes that key.
For listing keys, changing their name or expiry, and revocation through the API, see API Key Management.

